Frametile
Which image format should you use: WebP, AVIF or JPEG?
For most photos on the web, serve WebP at a quality around 80, and offer AVIF first if you can. In our test, AVIF was 47% smaller than JPEG and WebP was 35% smaller. Keep JPEG as the fallback for old software, and use PNG only when you need transparency or pixel-perfect graphics. Our PNG was nearly seven times the size of the JPEG.
Those numbers come from one photo, so treat them as a direction, not a law. The method is below so you can repeat it on your own images in a few minutes.
What we measured
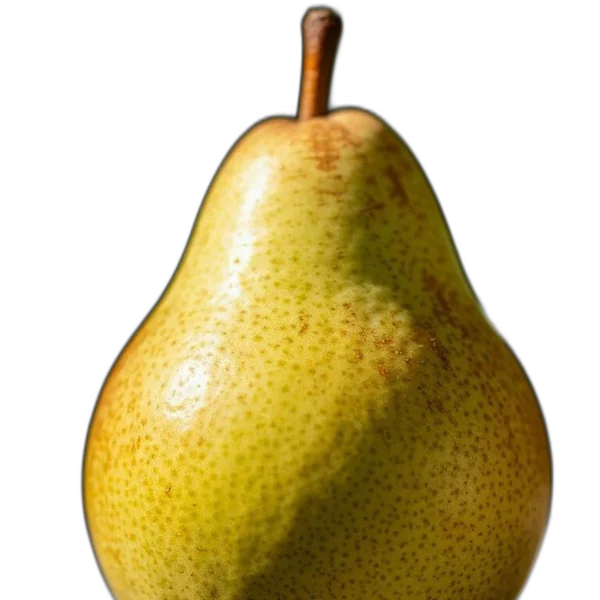
We took the sample pear photo used throughout the Frametile docs, resized it to 480 pixels wide with w_480, and changed only the output format. Then we did the same with JPEG at five quality levels. Every file was generated by the Frametile engine and measured as delivered.
| Format | File size | vs JPEG |
|---|---|---|
f_avif |
33.4 KB | 47% smaller |
f_webp |
41.3 KB | 35% smaller |
f_jpg |
63.6 KB | baseline |
f_png |
439.0 KB | 6.9 times larger |
| JPEG quality | File size | vs q_80 |
|---|---|---|
q_20 |
15.3 KB | 65% smaller |
q_50 |
25.6 KB | 41% smaller |
q_80 |
43.1 KB | baseline |
q_auto (85) |
50.5 KB | 17% larger |
q_100 |
200.7 KB | 4.7 times larger |
Two things stand out. First, the format choice alone saved a third to a half of the bytes with no change in size on screen. Second, the last step from quality 80 to 100 almost quintupled the file. That jump buys detail most people cannot see at normal viewing size.
What is the difference between JPEG, PNG, WebP and AVIF?
| Format | Best for | Watch out for |
|---|---|---|
JPEG |
Photos, when you need the widest possible support: email clients, old apps, image editors. | No transparency. Visible blocks and smearing at low quality. |
PNG |
Screenshots, logos, diagrams, and anything that needs transparency or exact pixels. | Lossless, so photos come out very large. |
WebP |
Photos and graphics on websites. Supports transparency and both lossy and lossless modes. | Some older desktop tools still cannot open it. |
AVIF |
Photos where every kilobyte counts. Usually the smallest of the four at similar quality. | Slower to encode, and the newest of the four, so keep a fallback. |
All current major browsers display WebP and AVIF. MDN keeps an up-to-date image format guide with support details if you need to check a specific browser.
What quality setting should you use?
Start at 80 for photos. It is the point in our table where the file is still small and the picture still looks clean. Then adjust by eye:
- Go lower (50 to 70) for thumbnails, blurred backgrounds and anything shown small. Artefacts are hard to spot at 200 pixels wide.
- Go higher (85 to 90) for hero images, product zoom views and photos with fine texture or smooth gradients such as skies.
- Avoid 100 on the web. It cost 4.7 times the bytes of quality 80 in our test.
In Frametile, q_ takes a number from 1 to 100 or auto, which means 85. It applies to JPEG and WebP output. A quick way to compare is to open two URLs side by side that differ only in q_, and zoom in on the busiest part of the photo.
https://frametile.com/api/YOUR_API_KEY/images/fruit/pear/w_800,f_webp,q_60
https://frametile.com/api/YOUR_API_KEY/images/fruit/pear/w_800,f_webp,q_80What if the image needs transparency?
JPEG cannot store it, so the choice is PNG, WebP or AVIF. With no f_, Frametile returns PNG whenever the result has transparent areas, for example after background removal, rounded corners with r_ or rotation with a_. That is the safe default, but it is heavy.
If the image will always sit on the same background colour, you do not need transparency at all. Flatten it with b_ and switch to a lossy format: r_40,b_FFFFFF,f_jpg.
How do you serve the right format from one URL?
Two options. The simple one is f_auto, which returns WebP, or PNG when the image has transparent areas. Add q_auto and you have a sensible default for almost any photo:
https://frametile.com/api/YOUR_API_KEY/images/fruit/pear/w_800,f_auto,q_autoThe thorough one is to offer AVIF first with a <picture> element. Browsers pick the first format they understand and skip the rest, so every visitor gets the smallest file they can display:
<picture>
  <source type="image/avif" srcset="https://frametile.com/api/YOUR_API_KEY/images/fruit/pear/w_800,h_600,c_fill,f_avif">
  <source type="image/webp" srcset="https://frametile.com/api/YOUR_API_KEY/images/fruit/pear/w_800,h_600,c_fill,f_webp,q_80">
  <img src="https://frametile.com/api/YOUR_API_KEY/images/fruit/pear/w_800,h_600,c_fill,f_jpg,q_80" width="800" height="600" alt="A pear">
</picture>Put f_ and q_ in the same step as your resize, as above. Each URL is generated once and then served from storage, so three formats cost three first requests, not three on every page view.
Image format checklist
- Resize first. A 4000 pixel photo in the best format is still far heavier than an 800 pixel one; see how to resize and crop images by URL.
- Use WebP for photos by default, with
f_auto,q_autoas a one-line starting point. - Add AVIF through
<picture>on pages where images dominate the weight. - Start quality at 80, go lower for small images and never use 100 on the web.
- Use PNG only when you need transparency or exact pixels, and flatten with
b_when you do not. - Measure on your own photos. Open the URLs, check the sizes in your browser's network panel and trust your eyes over any table, including ours.
Every format and quality setting is listed in the output section of the docs.
Try it on your own images
Upload a photo, copy its URL and start editing the URL. Every parameter above works the same way.